

How can I control access to my embedded analytics?
As a Sigma customer, you have access to multiple levels of security for your embedded analytics. This allows you to tailor the level of access to the exact needs of your users. All embedded analytics are built off of existing workbooks within Sigma. However, your ability to fine-tune permissions is going to depend on the type of security your embedded analytic uses.
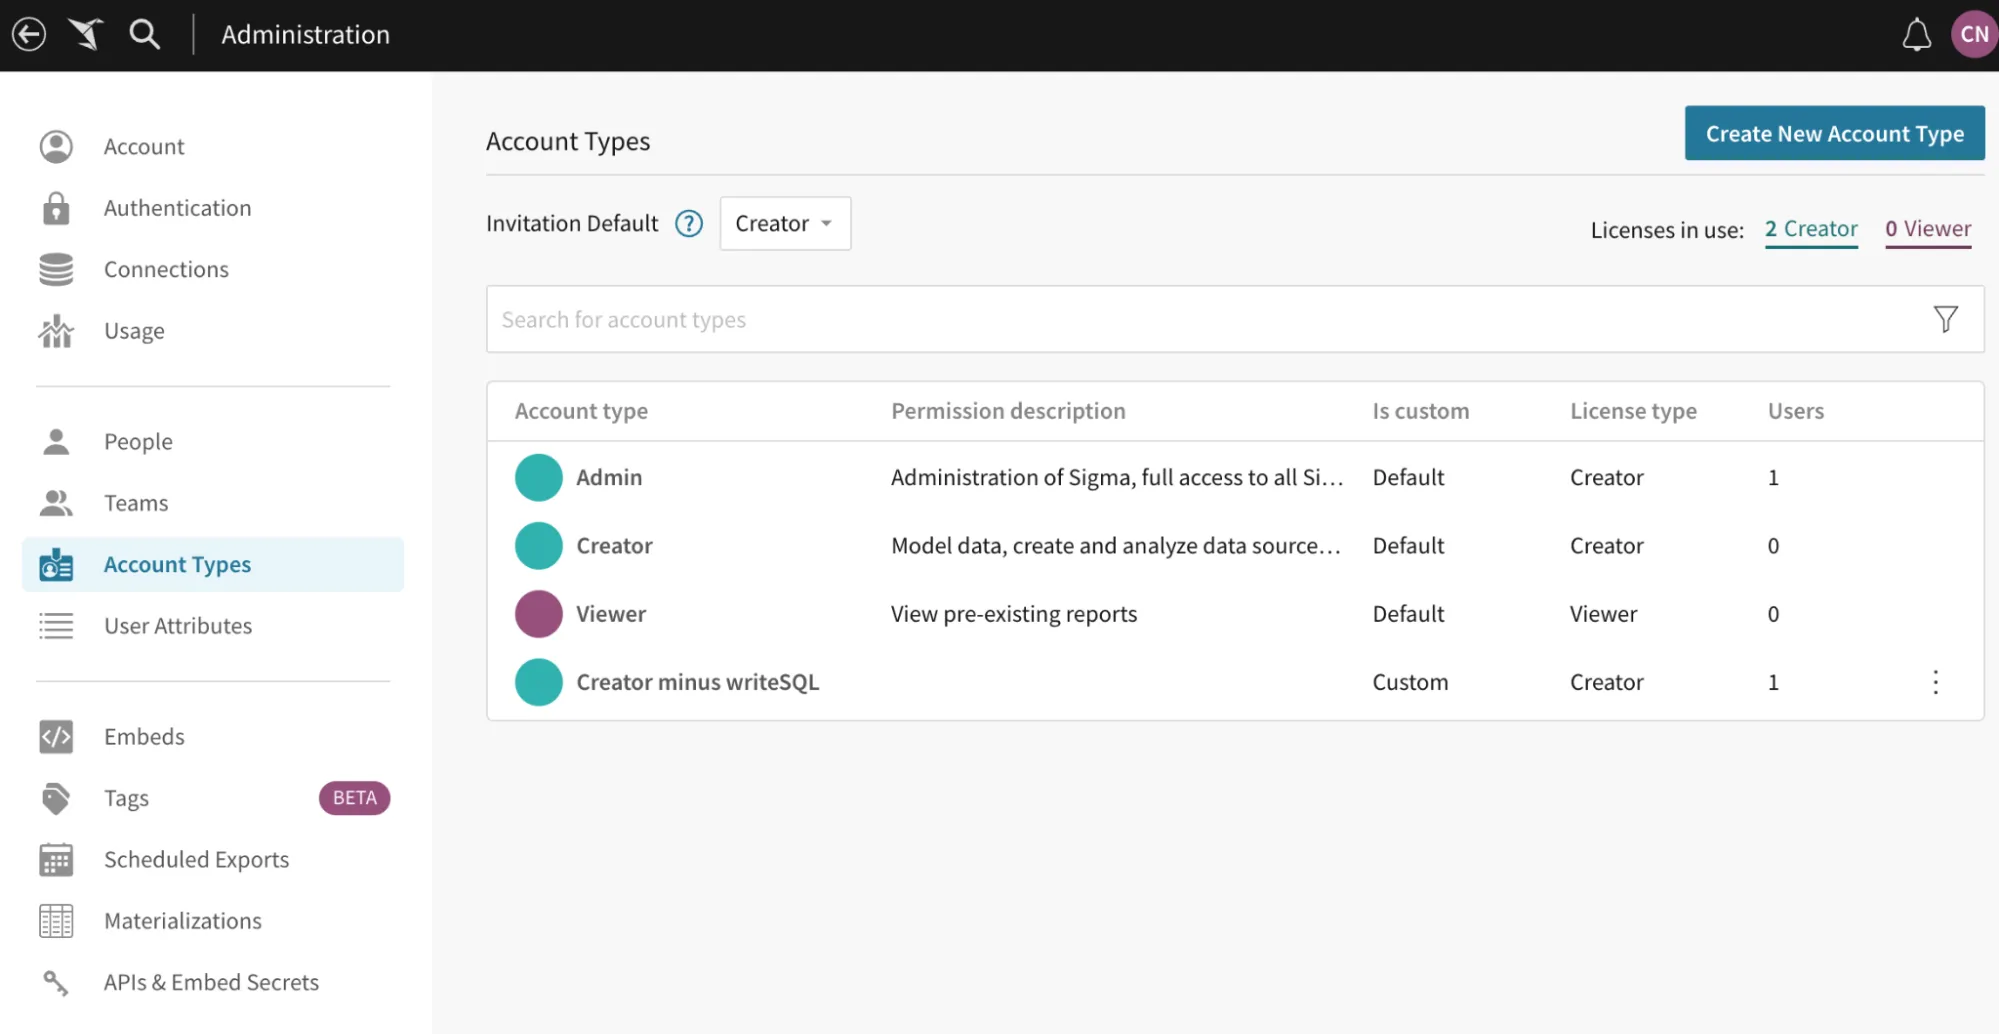
The main way you can adjust what users in Sigma can do is through the account types menu. This allows you to view the default account types as well as create new ones. Here, we have an account type that uses the Creator default, but removes the Write SQL permission. This might be useful if, for instance, you want to manage warehouse spend by limiting the queries users can write.
What types of embeddings are there?
Public Embeds
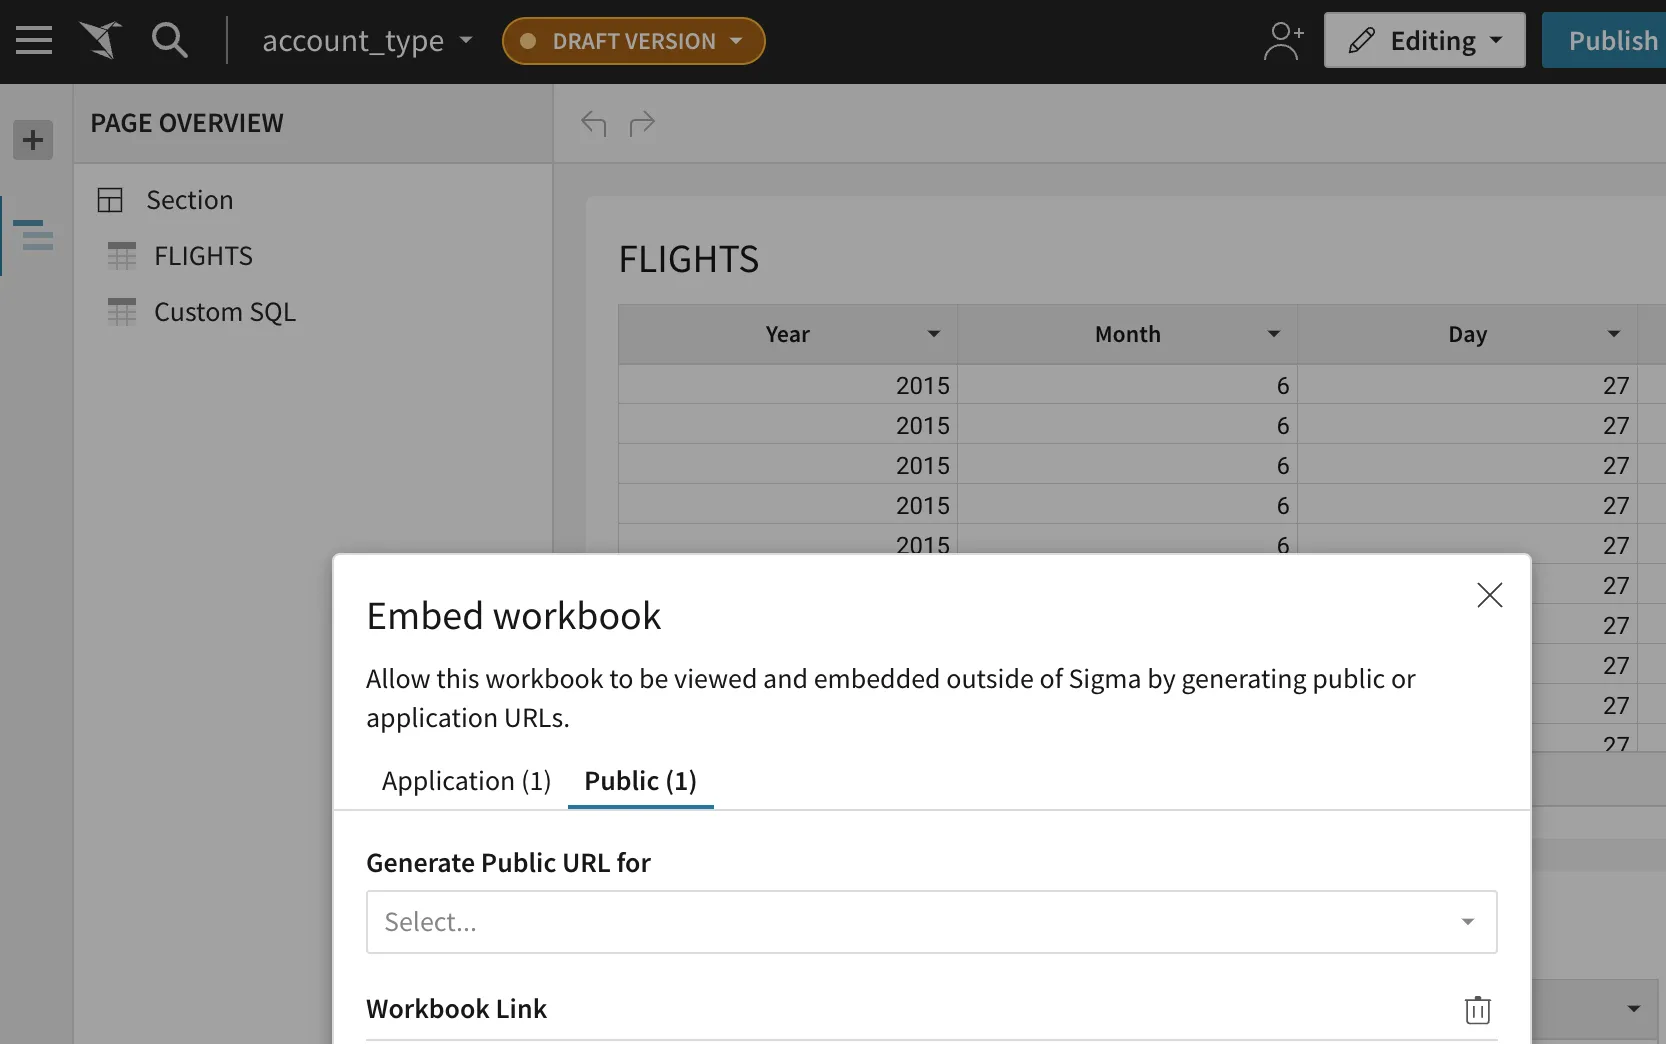
Public Embeds are the most permissive and easiest to use of the security types. They are created in the “Public tab” of a workbook’s embedding menu.. You can create a public link for either the whole workbook or any of its pages or elements. After that, all you need to do is insert the link you are given into an html iframe in your application.
As the name suggests, anyone with the link is able to view these embedded analytics.
Private Embeds
These are the next simplest to use, but are less flexible than the other types. Access is determined in the same way as the parent workbook i.e. the user must be logged into Sigma and at least be able to view the document. Additionally, the level of access granted is the same as the parent workbook. See the private embedding page for more details on how to set these up.
Secure Embeds and Row level security (RLS)
Secure embeds are the most powerful type of embed, but are a bit more complex to set up. They allow you to further fine-tune permissions by giving you the full set of permissions available on workbooks.
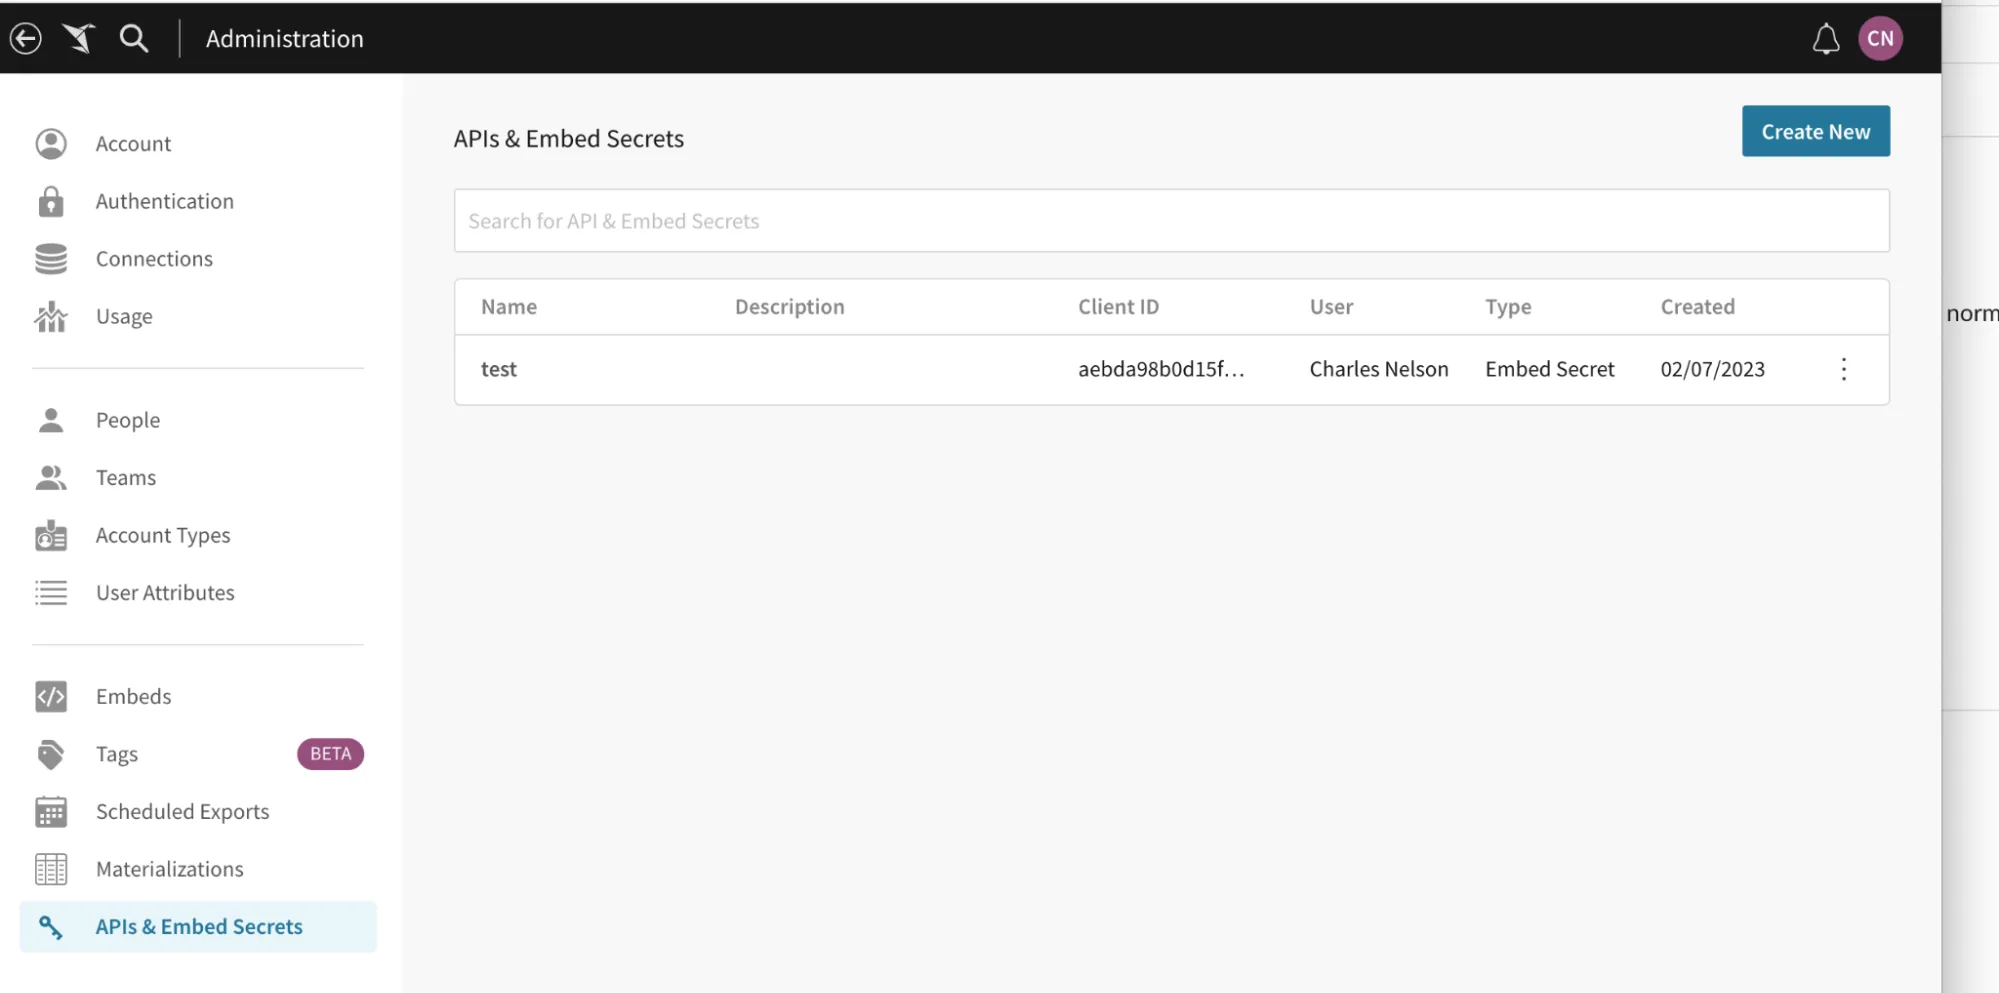
Secure embeds require an embedding client credentials you generate in the administration menu. Once you have that, an application embedding can be created in the “Application” tab of the workbooks embedding menu.
Your integration will need to sign the link using a signature parameter that your application generates every time it loads the iframe. Links can only be used once to prevent unauthorized use.
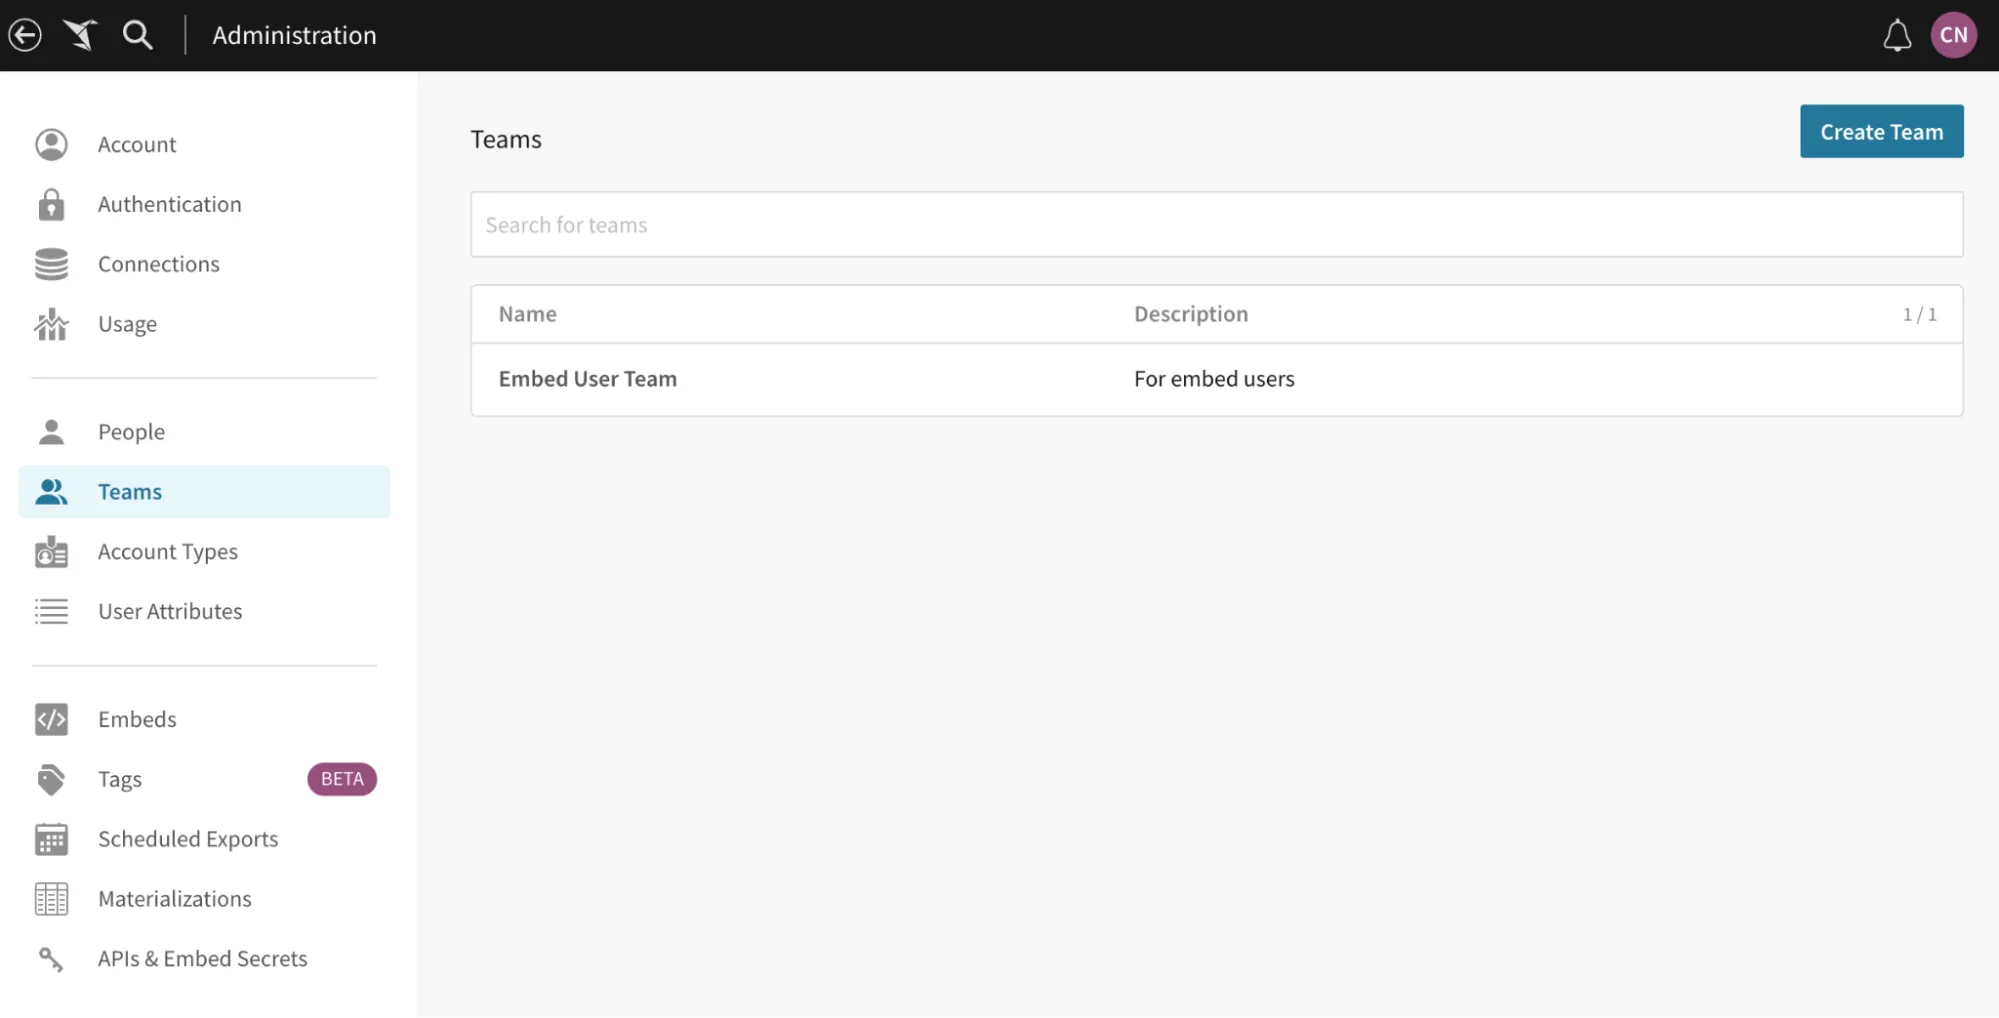
Setting up secure embeds requires setting up a team for the embed users which are created when someone visits the embed. This can also be done from the administration menu. Read more at the secure embedding help page. This will be the team embed users are created in when your users visit a secure embed.
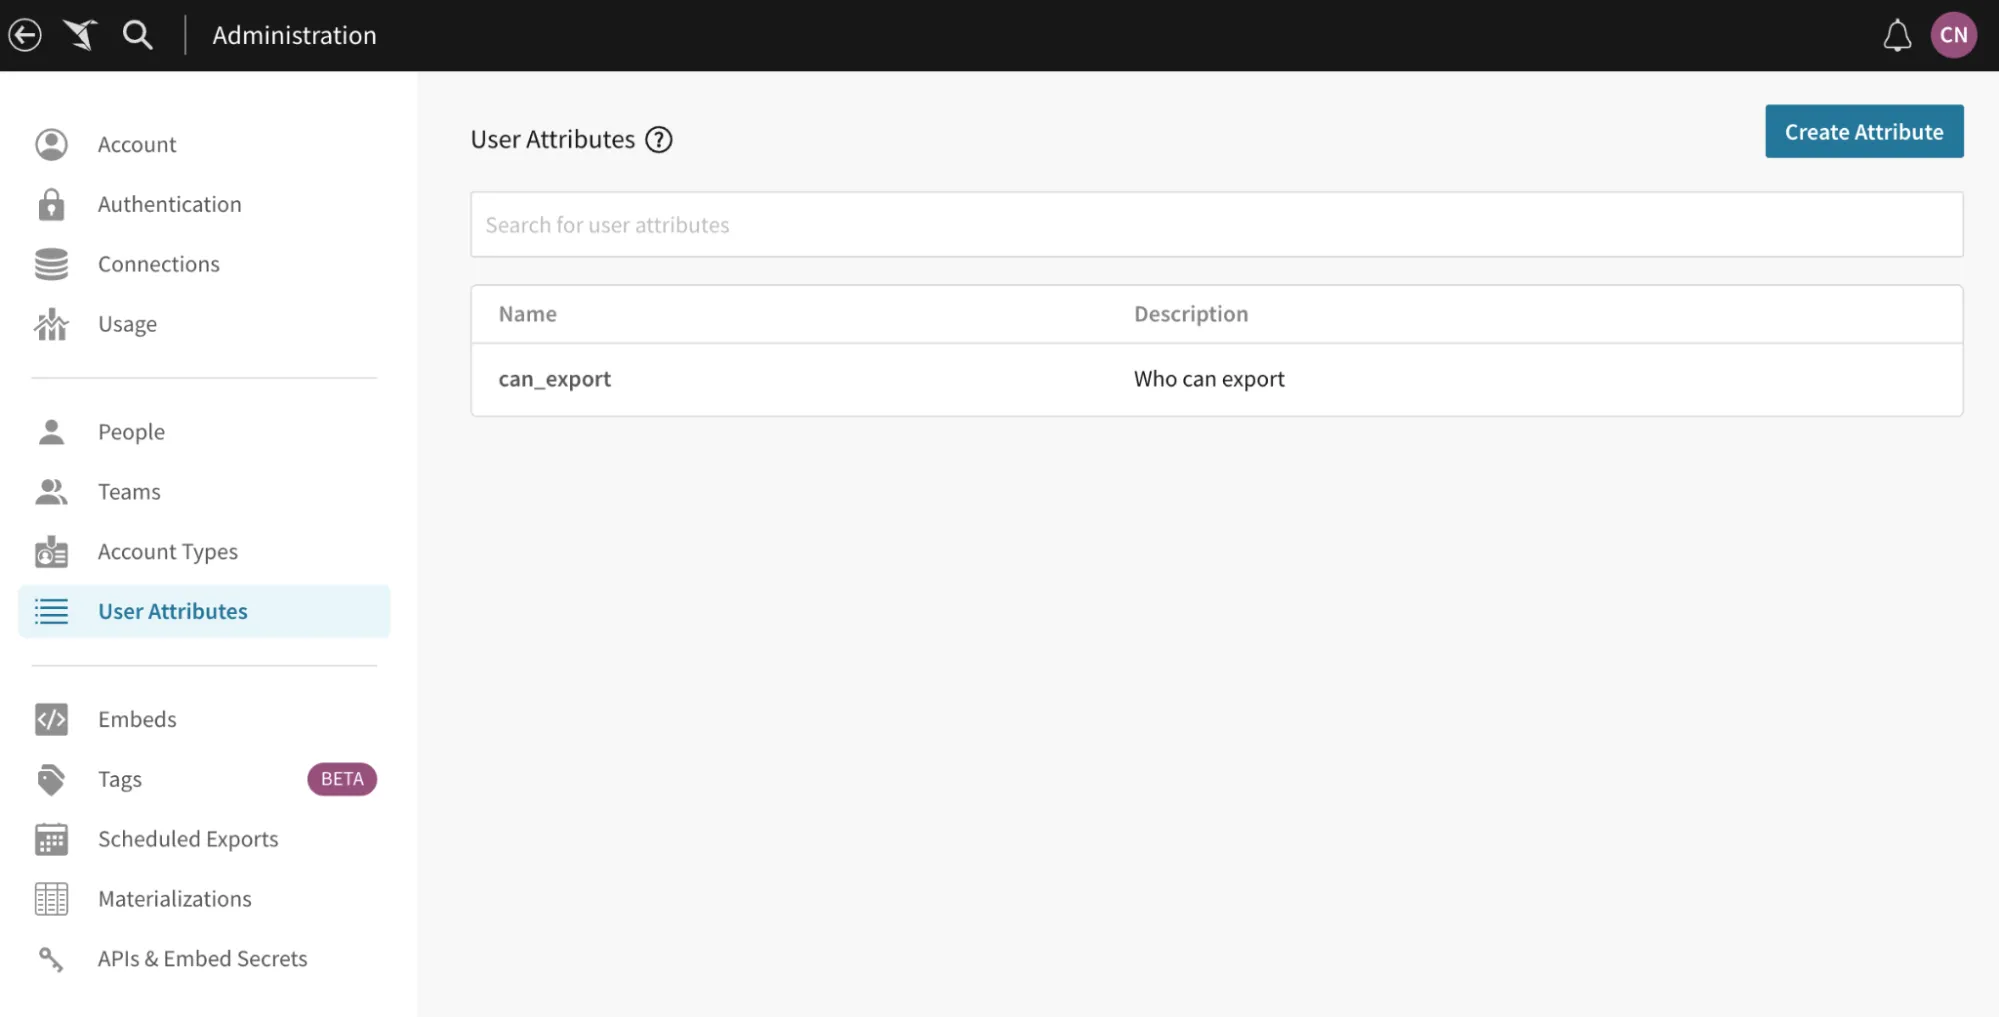
Row-level security (RLS) is also a feature of secure embeds, which allow you to control what users can see based upon permissions you set in the application embedding URL. To make full use of RLS, you first need to set user attributes in the administration menu. Then you can set the interactions with those user attributes in the workbook itself. Finally, the embed will make use of the user attributes you provide in the URL to only show what your users are supposed to see.
Downloads
Users with appropriate permissions can download files from private embeds, and secure embeds. You should tailor the permission for both normal and embed users appropriately to the data they will have access to. For example, it might be appropriate to give your developers full access to downloads, while your customers are given a much more limited picture.

Private embeds support downloads using the same systems as the base workbook. These are account types that support export (creator by default), as well as having exports enabled in the workbook settings.
Secure embeds are highly customizable in what downloads they support. Download permissions are configured both through the workbook settings and the account type set in the embed URL.
Cloud exports and webhook exports
There are two other types of exports that don’t show up in the workbook. Cloud exports allow you to export workbook data to Google Cloud Storage and Amazon S3 from your existing Snowflake connection. There is a limit of 5GB on exports, but this still allows for much larger embeds than the basic workbook export.
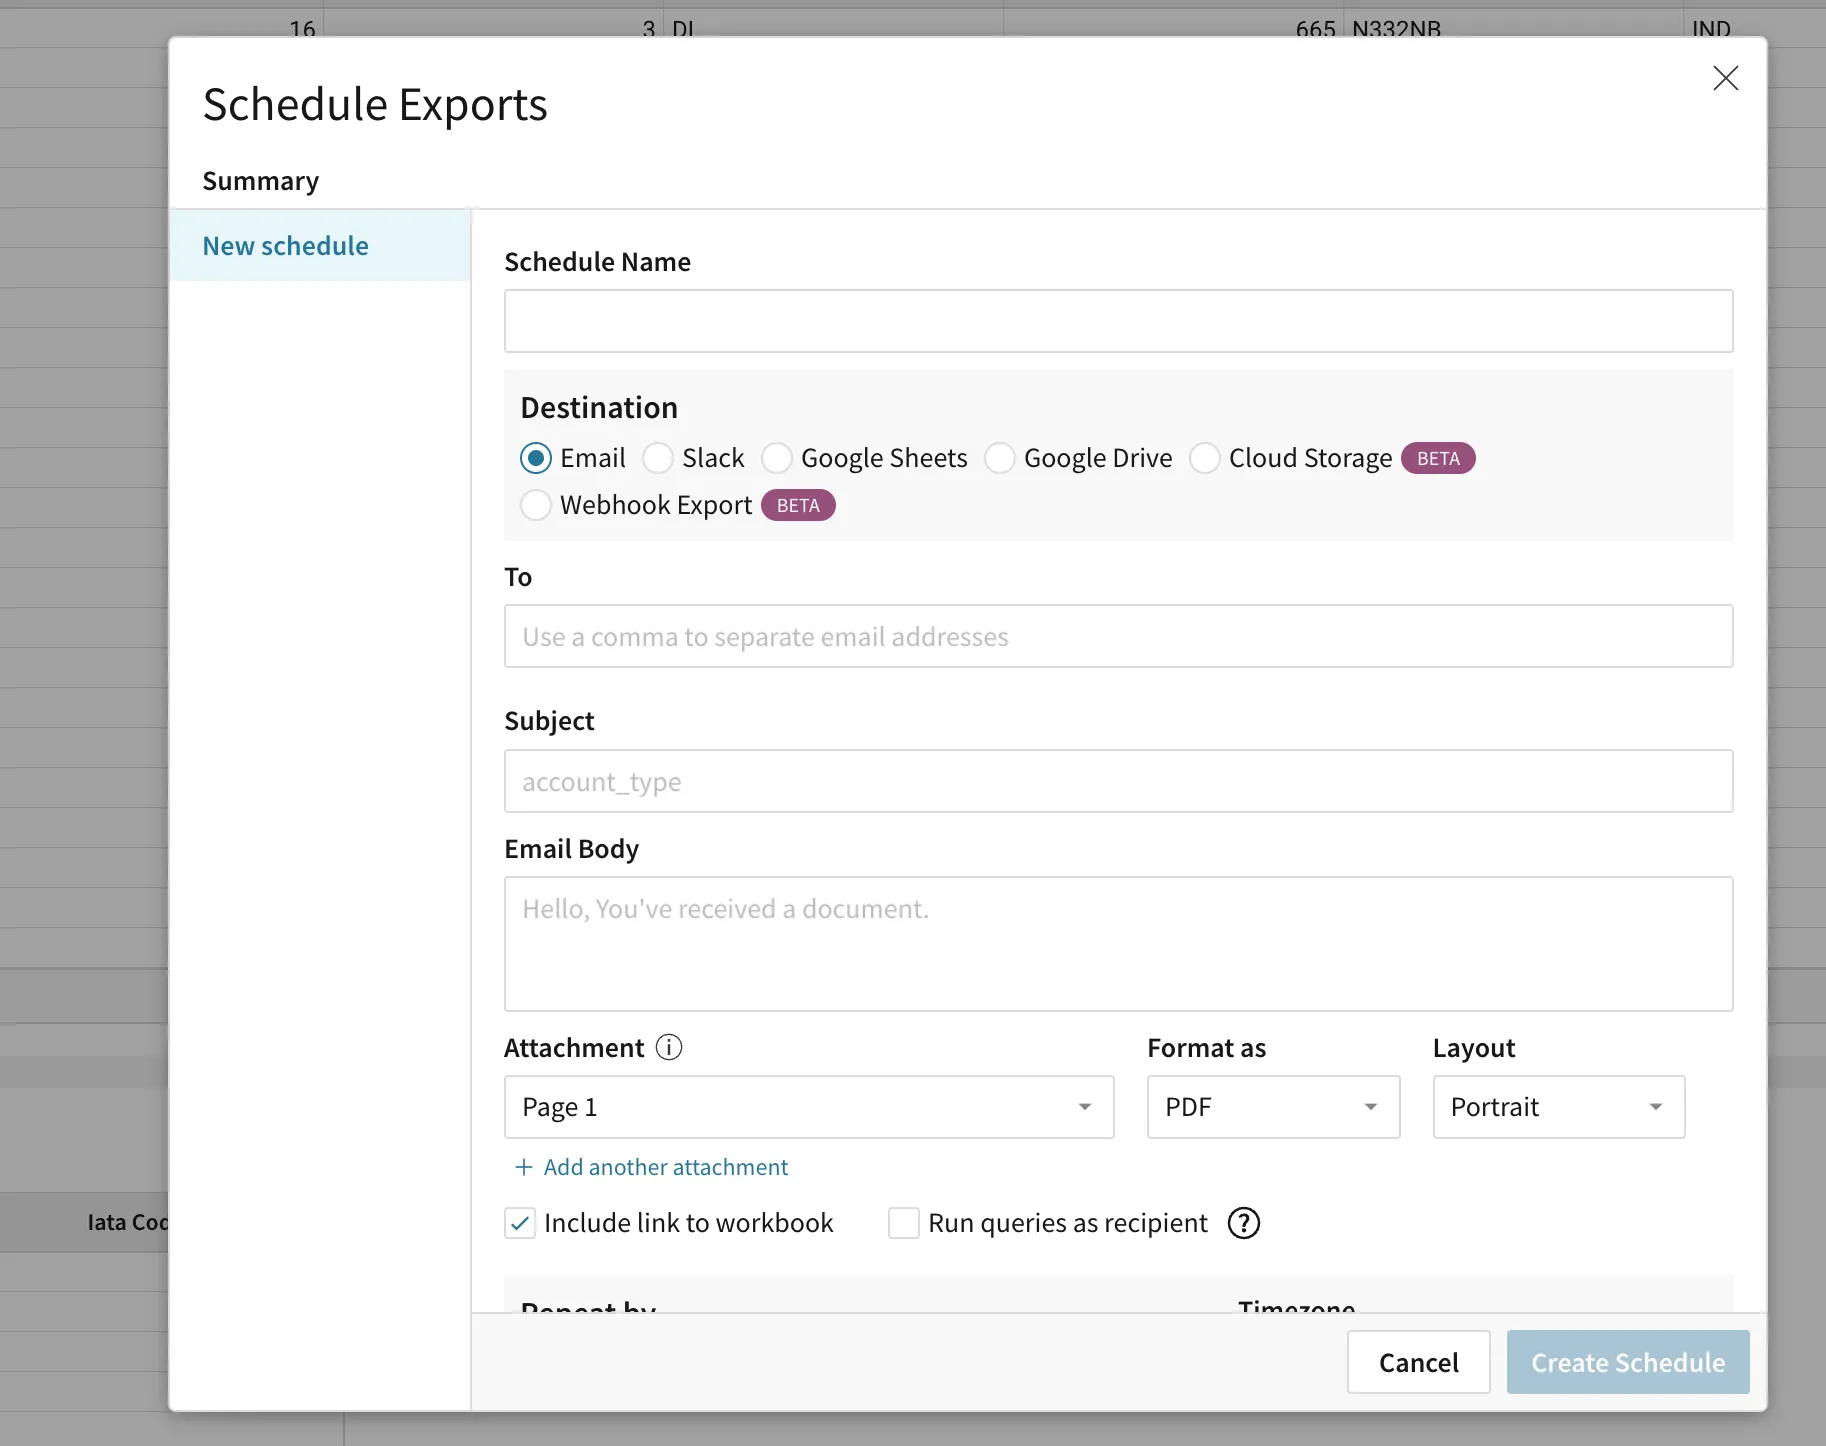
The final way to export is through our scheduled exports functionality. This allows you to programmatically send exported files to popular applications or your own services in order to have a running backup of what’s in your workbook. To set up scheduled exports, use the scheduled exports button in the workbook menu. This will bring up a new menu allowing you to choose the schedule, format, and destination of your exports.
Read more about How to Establish Embedding here.


